Creative Projects - Workflow Diagram
Creative Projects: Workflow Diagram
Now that we’ve got the functionality nailed down, let’s specify how the user interacts with our service and the order in which things happen. We’ll do this by creating a workflow diagram
Why do this?
Well a workflow diagram is a really nice bridge between application design, interaction and code. Because it makes you think about the branches, the logic and the actions in your system. We’ll use this later to translate our interaction to a basic first cut prototype.
Diagraming
There’s lots of great tools that can be used to create a good diagram.
- Tools like Keynote, Powerpower and Word are obvious choices. Illustrator too if you have access to it.
- There’s only diagramming tools like Draw.io that let you create them in the browser.
- If you use Sketch on a mac, there’s plenty of templates for workflows and user flow diagrams
- You can build on top of this mobile workflow for Illustrator if you plan to make an SMS app
- Grafio has great UX Flowchart templates too. Omnigraffle is a useful tool too (free 14 day trial)
Approaches
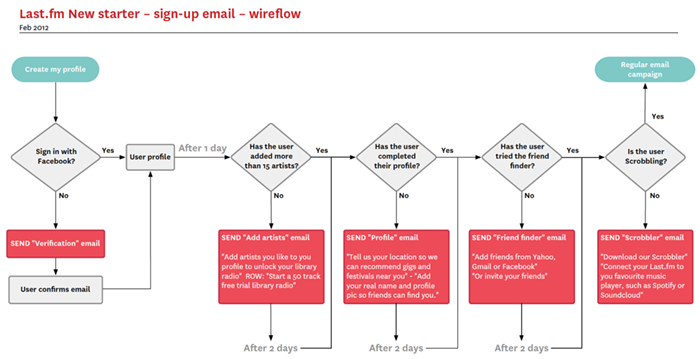
Graham Todman’s New starter email campaign user flow shows a traditional workflow diagram approach. It shows how to quickly “ sketch out an email stratergy for communication with new starters, offering prompts to fill profiles, engage with the service, or hints and tips as a response to (or lack of) user activity.”
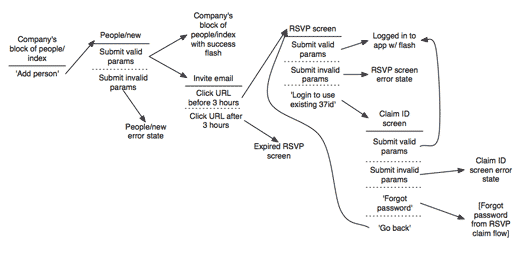
37 Signals offers a really lightweight shorthand for designing UI flows.
BotDesign.ai illustrates how these methods can be applied to designing chatbot conversations to show the conversational structions, decision points and overall dialog that unfolds. “These complex decision trees illustrate the relationship pieces of dialogue have with each other, with directional lines indicating possible paths to other nodes of dialogue based on a user’s action.”
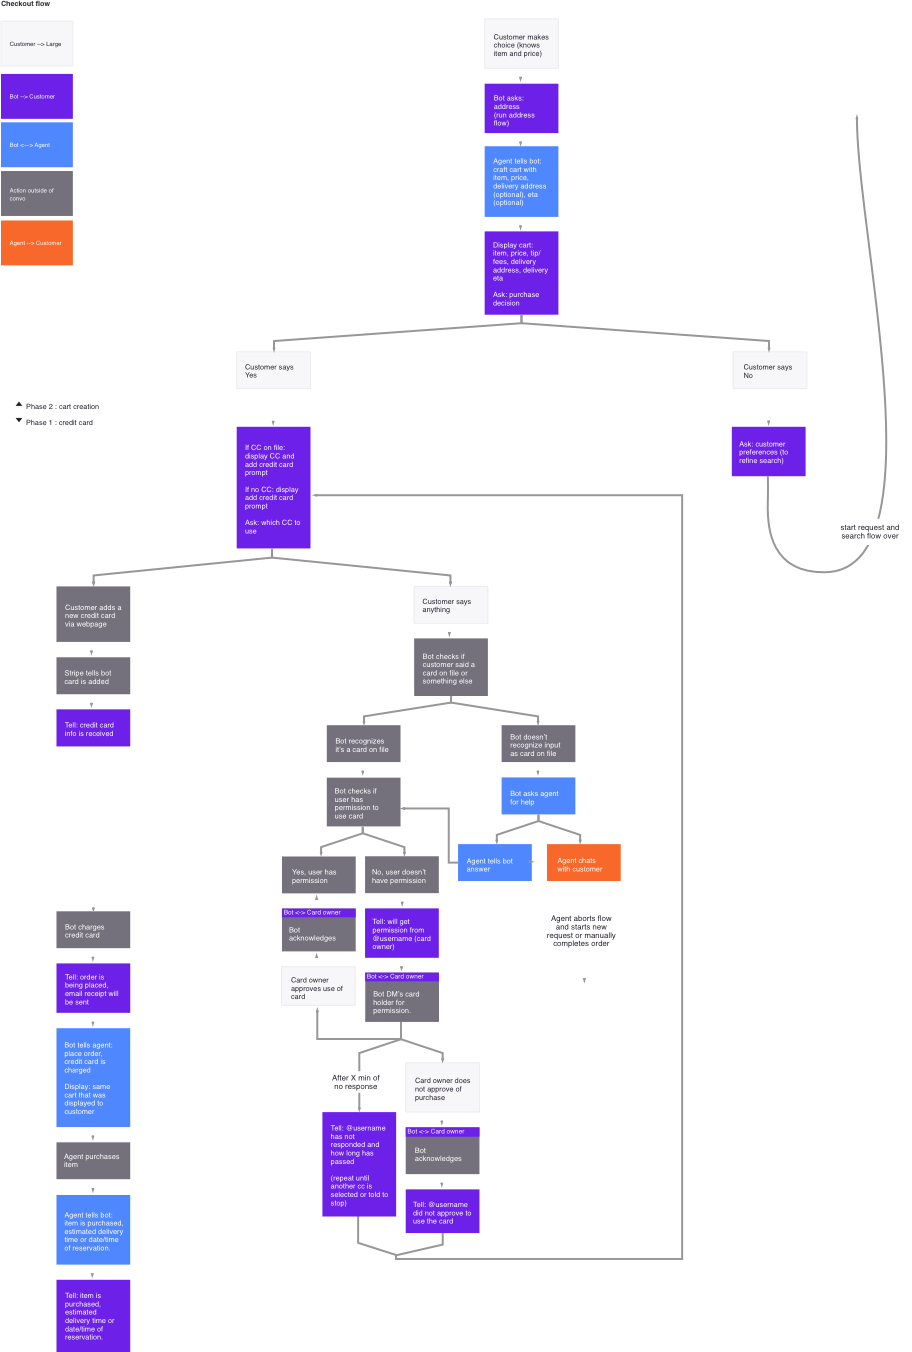
ArcTouch offers a template for the workflow diagram specifically for bot conversations. Designing the UX flow for a conversational commerce chat bot

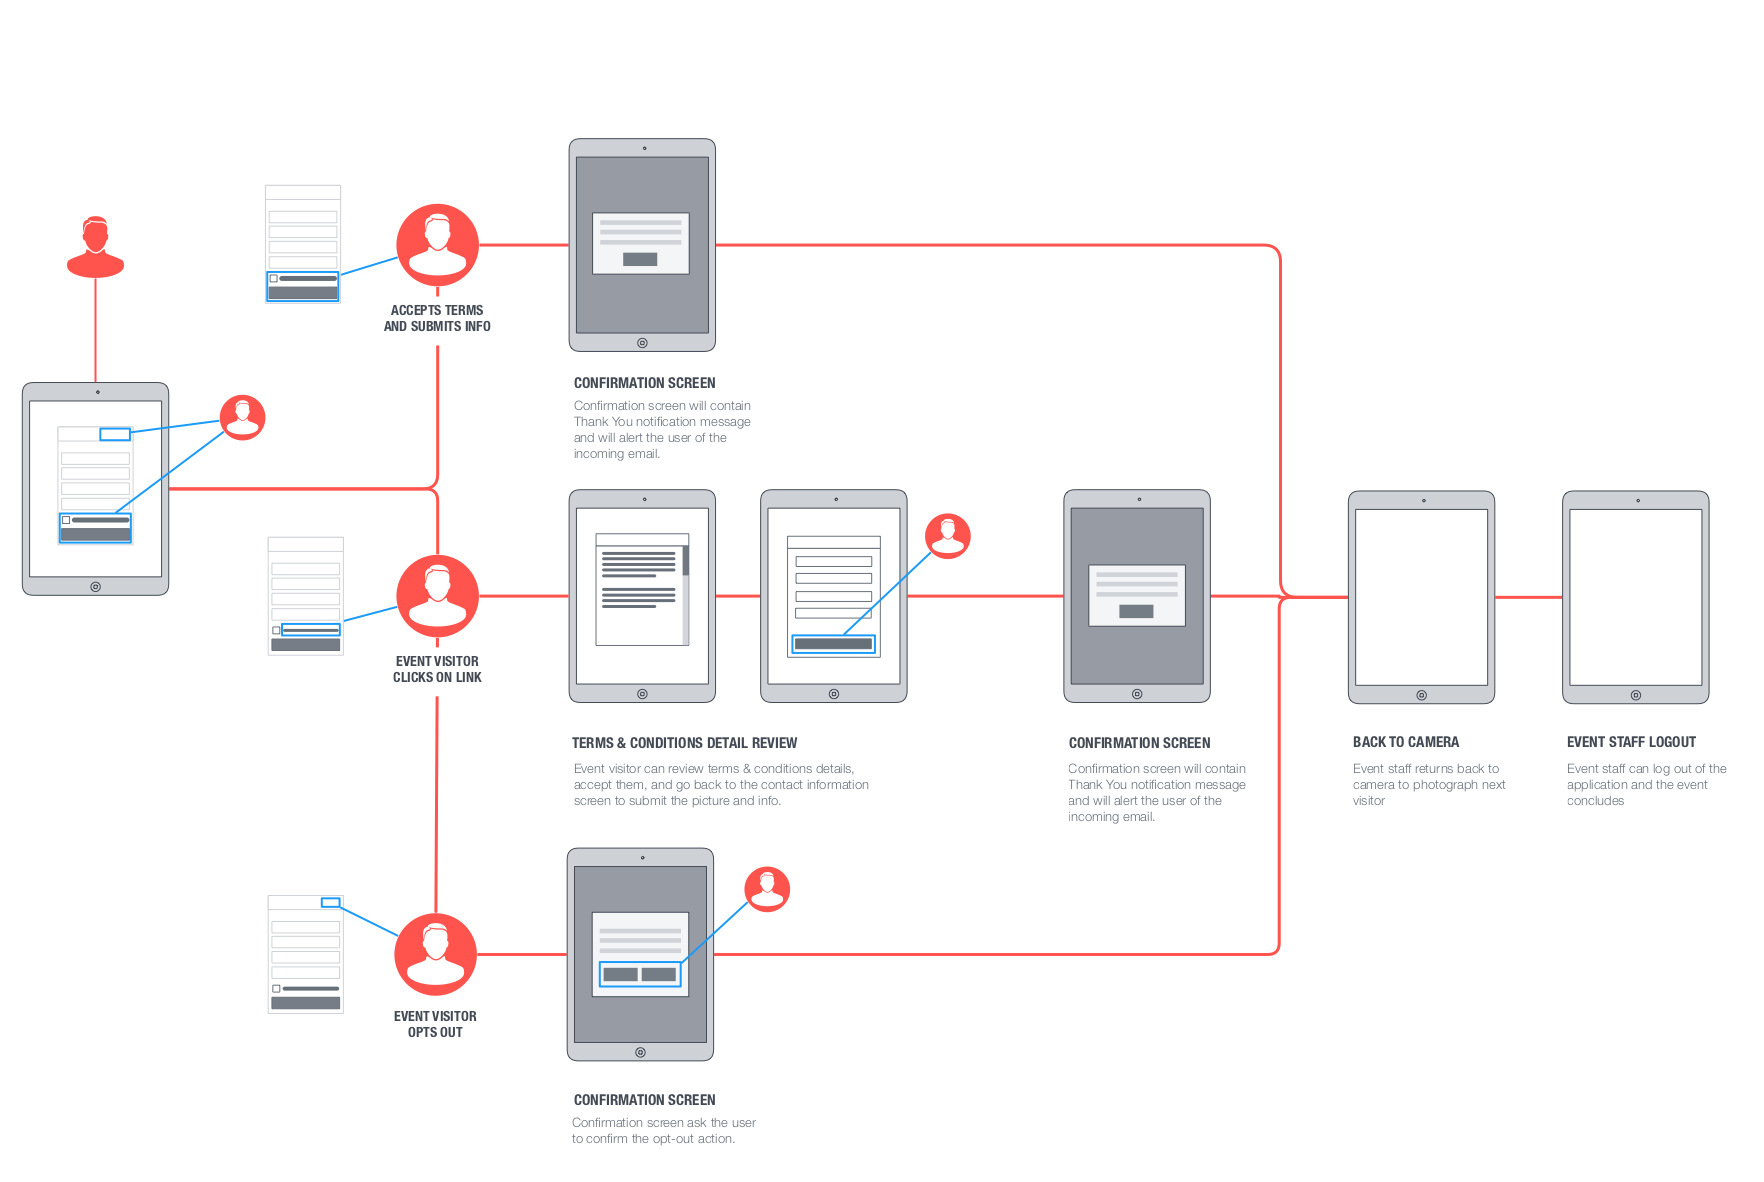
or you can integrate a storyboard with a workflow layout to have a graphical depiction of content and decisions as suggested by tentouchapps
Considerations
-
Don’t forget to handle errors and unexpected entries gracefully.
-
Account for things that the user doesn’t trigger e.g. schedule tasks like a summary email or a report that comes out on the weekend.
-
Play act: Try it out by putting yourself in the user’s shoes. Does it work? Does it make sense?
-
Refine: Look at long chains. Try and simplify interactions where you can. Avoid complexity or anything that takes more than 2 steps to complete.
-
Annotate: Add things you know around each action. Label things you know or need to know for each state. Is a piece of information NEEDED to proceed. Note that. Do you need to know what preceeded it, note that too. If the action is scheduled or triggered, label when it is triggered and why? What are the conditions where it needs to happen?
-
If you need to, it’s perfectly OK to create multiple diagrams i.e. you could have a main diagram with a series of diagrams that do a deep dive.
Submitting your Workflow
Add it to your Project Markdown file in your student folder.
These files are written in Markdown pages (see this cheatsheet too)
You can edit this in one of the following ways:
- You can edit it raw within your text editor of choice
- GitHub provides an online inline editor - visit the repo, open the file, and click the edit icon in the toolbar (right hand side).
- You can use an online tool like Dillinger or StackEdit to develop your document, and then copy and paste to your repo.